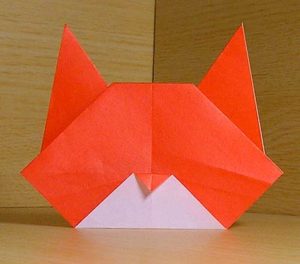
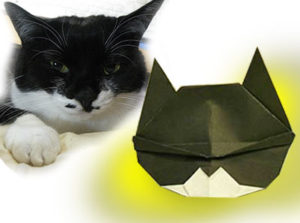
猫折り紙:其の二【ハナちゃんの顔】(page1)
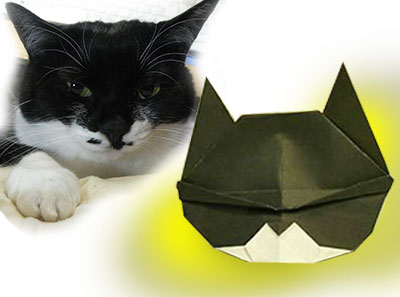
Origami Cat 2 “My Dear Cat Hana”(page1)
★★★☆☆☆中級 Intermediate
創作折り紙 Original by nekohon.jp
猫其の一の、発展形です。愛猫ハナにそっくり(うふふ)。
Developed from Cat1. Hana is my cat’s name.
折り方 1 Step 1
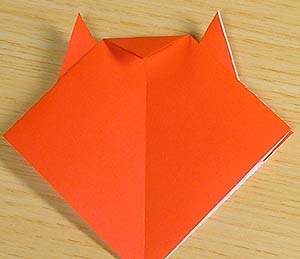
ここまでは「猫 其の一」と折り方は同じです。
- 最初から御覧になる方は猫其の一 page1.へ。
- 下の基礎折りを説明を見なくても折れる方は猫其の一 page1.折り方7へ
Same as “Cat 1“, till step 8.
- To see from the beginning, go to Cat 1 page1.
- If you know this square base by memory, go to Cat 1 page1 step7.

折り方 2 Step 2
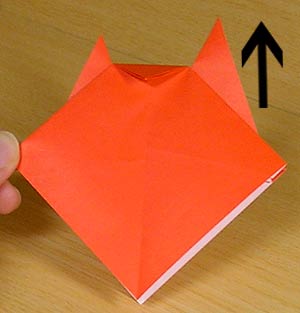
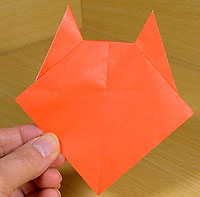
耳の先をやさしく引っ張って、耳を大きくします。
大きな耳にすると、おでこが広くて顔が平たい子猫顔になります。ふてぶてしい雄猫にする場合は、耳を引っ張り出さず、小さい耳のまま折り進んでください。
耳ができたら、全体を裏返します。
【注】「猫其の一」では、全体のバランスを見やすいよう、この行程を一番最後に行いましたが、「猫其の二」ではこの時点で耳のサイズを整えておく必要があります。
Pull out both ears gently.
If you pull out large ears, your cat will be a cute one with wide forheads. If you want a boss Tom, leave the ears small.
NOTE : With “Cat 1”, we pulled out the ears on the last step. However with “Cat 2”, we have to enlarge ears at this stage.
折り方 3 Step 3
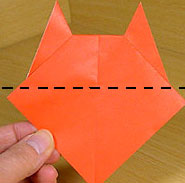
次に、目になる部分を折ります。
点線で谷折ります。はしっこの処理(青い円)は、「折り方4」を参考にしてください。
We are now folding the eyes. See “step 4” for the edge part (blue circle).
折り方 4 Step 4
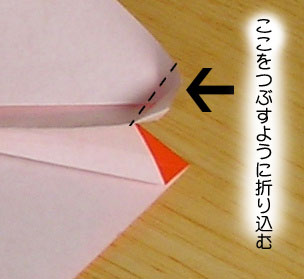
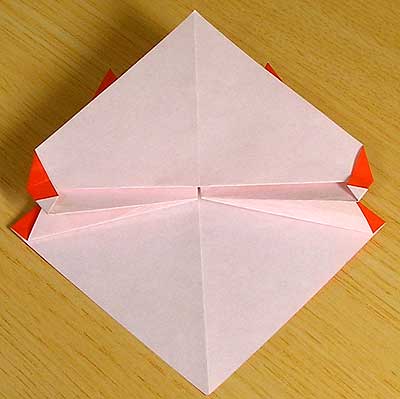
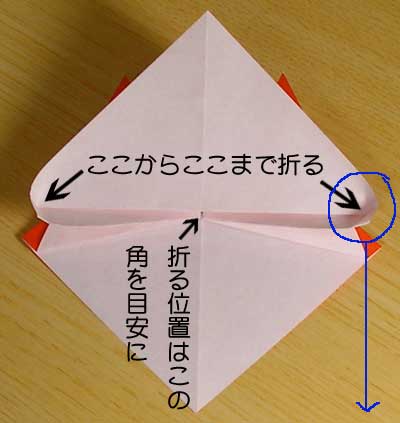
端は、写真のように折り込みます。ここの端は、あとで綺麗に見えるように処理しますので、折る角度など、今はあまり神経質にならなくて良いです。
全体がこんな感じに、平らに開くようになればOK。
Squash fold the edges and flatten the whole thing like this. We will round off the ridges later, so don’t be too nervous.
折り方 5 Step 5
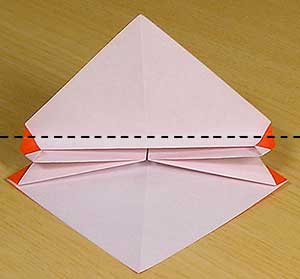
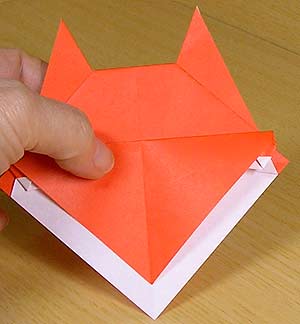
点線でまた折ります。これが目の幅になります。
Valley fold and make a pleat. This will be the eyes.
折り方 6 Step 6
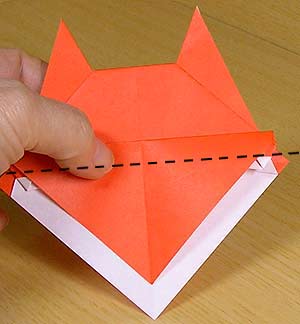
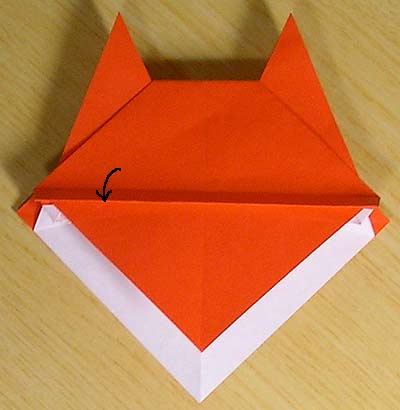
点線で下に折ります。フラップを降ろすような感じに。
Valley fold, like bringing a flap down.
折り方 7 Step 7
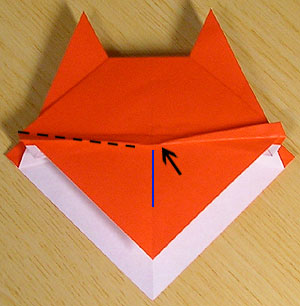
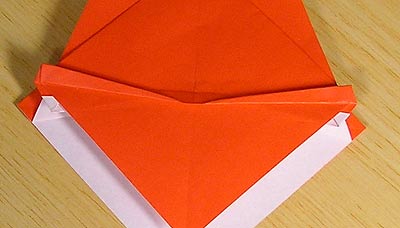
いよいよ、目を折ります。
点線で三角形に上に折り上げます。鼻梁を残すため、写真の青い中心線より、少し内側から(矢印から)折りはじめるようにします。
Now, the triangular eyes. Leave a little space in between to resemble the nose.
折り方 8 Step 8
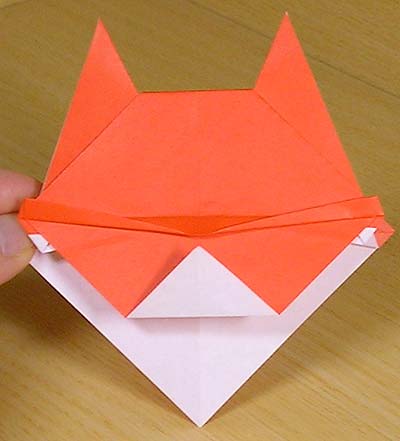
次は、お口まわりです。まず、このように三角に折ります。
The next step is the muzzle. Valley fold showing the white underside of the paper.
折り方 9 Step 9
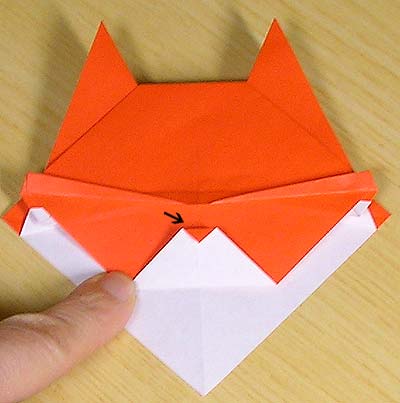
お鼻はかわいい三角形に。
Fold a small triangle nose.
つぎに進む→ next→
他の猫折り紙もぜひご覧ください
For more origami cats;
*猫折り紙 Origami Cats
「猫折り紙」の著作権等については、こちらをご覧ください。
*猫折り紙について

