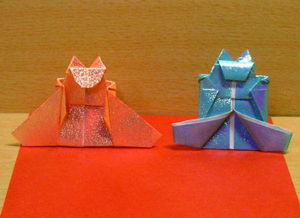
猫折り紙:猫のお雛様(女雛)page2
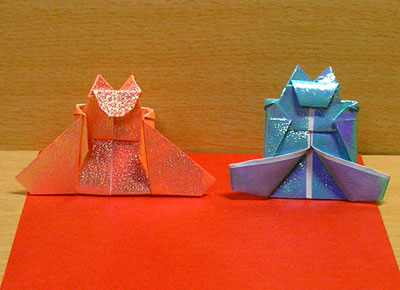
★★★★☆☆ 中級上 High Intermediate
Origami Cat Hina Dolls (Princess) page 2
創作折り紙 Original by nekohon.jp
猫さんがいると、雛人形もうっかり飾れません。高価な雛壇で猫さんが暴れたら(汗)。
その点、折り雛なら気楽!猫さんが遊んでも囓っても全然OK♪
どうせならお雛様も猫形にしちゃえ、ってわけで、猫雛の折り方を考えてみました。
Hina Dolls are very risky, if you have cats in your house. Cats are always eager to play around, climb, and mess about.
It might be better for your nerves to forget about the expensive traditional Hina Dolls, and put Origami Dolls instead. Even better, if they are Cat-shaped Dolls.

←前に戻る ←back
折り方 13 Step 13
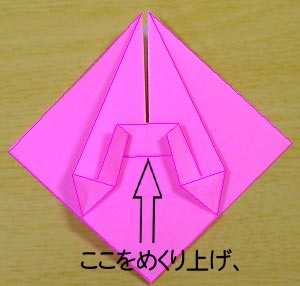
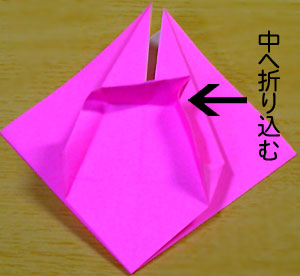
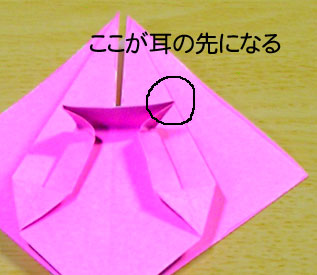
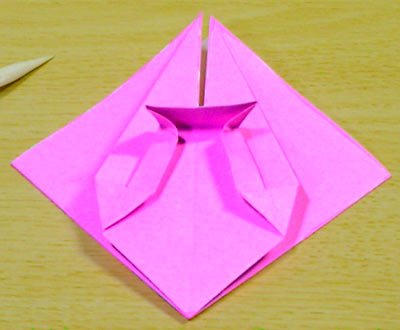
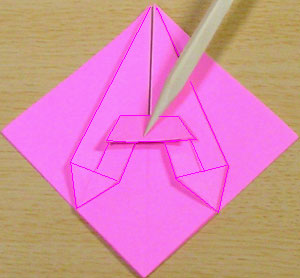
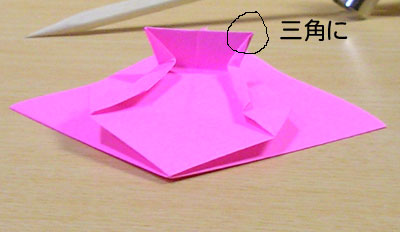
ここから折る部分は、耳になります。「猫のお雛様」行程中、一番細かい作業となりますが、耳があってこそ「猫のお雛様」。この耳が無ければ「ただのお雛様」になってしまいます。頑張って折ってくださいね。
*この角が耳の先っぽになります。三角形にしっかり角をつくってください。
Now, we will fold the ears. This is the most difficult part in making “Cat Hina”; but, without the ears, the dolls would just be ordinary human-shaped dolls. So, come along!
* The circled parts will become ear-tips. Fold it well pointed.
折り方 14 Step 14
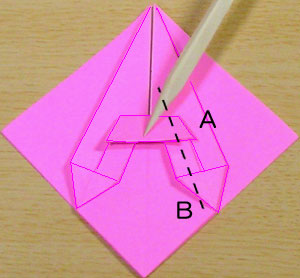
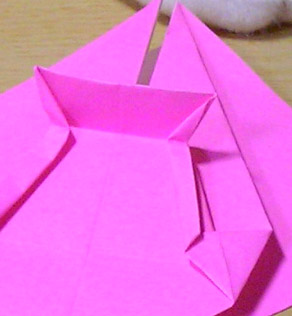
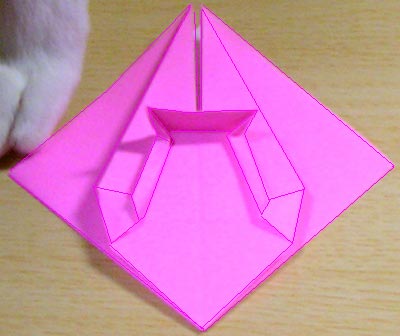
もういちど、中割りに折りますが、このときも、耳の先端にあたる部分Aが、三角にとがるように調整して折ってください。Aがきれいな三角になっていれば、Bのあたりは多少ずれてもかまいません。
左右対称に折ってください。
Fold again, caring that the tip of the ear is pointed well. If “A” is in good shape and pointed, don’t worry so much around “B” even if it is little crooked.
折り方 15 Step 15
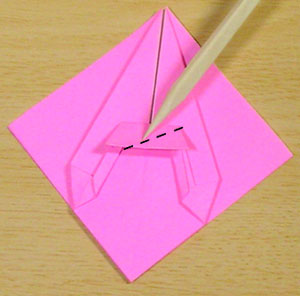
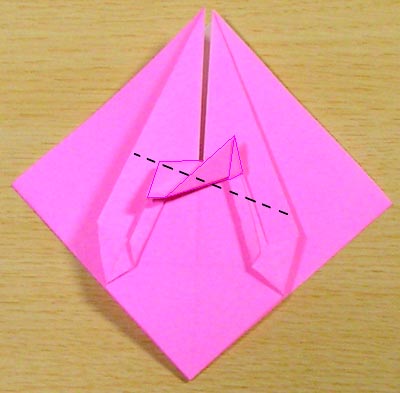
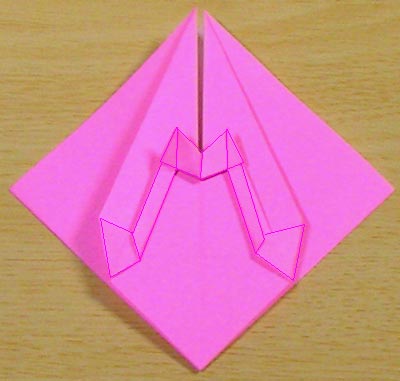
耳を折ります。この時、中央部分は分厚く折り重なります。しっかり押しつぶしてください。
Fold the ears. Center part will be layered thickly, so press well.
折り方 16 Step 16
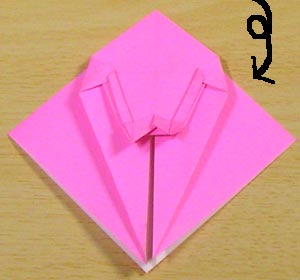
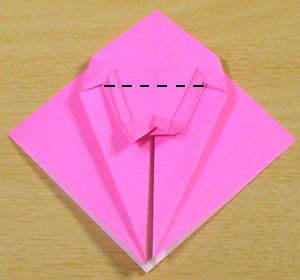
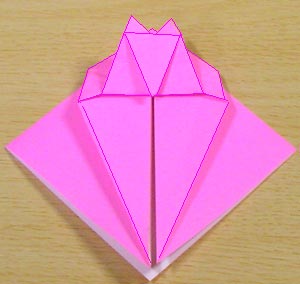
上下ひっくり返して、谷折り。猫の顔が見えてきました?でも、このままではあまりにキツネ顔(笑)
Turn upside down and fold. A cat’s face is showing now; or a fox, may be? Muzzles are still too long.
折り方 17 Step 17
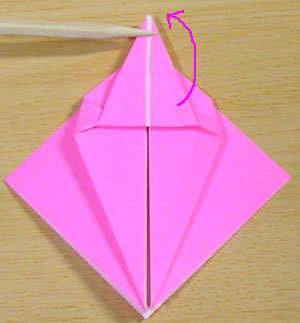
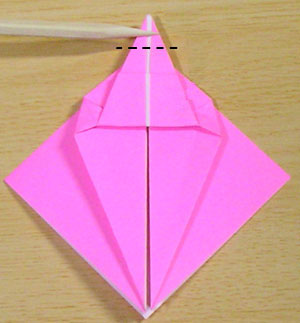
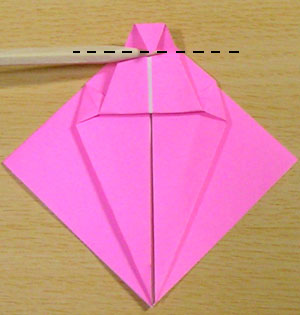
鼻先を一度上にあげて、折り込み、顔を整えます。
Fold so that it looks like a cat, not a fox any more.
折り方 18 Step 18
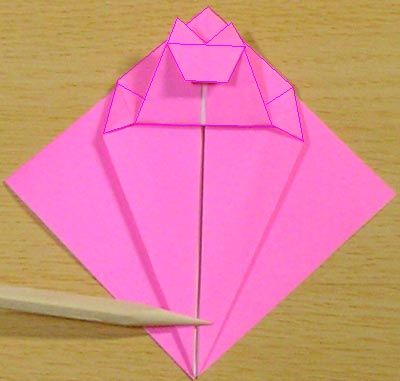
これで、「猫のお雛様」の基礎ができました。あとは、折り方によって、装いをどう見せるかの工夫になります。
The very basic part of “Cat Hina” is completed. We will arrange this and make it transform into a princess, a prince, sitting, or standing.
- 女雛はこのまま【折り方19】へ to continue, go on to Step 19
- 男雛へ to Prince (sitting)
- 立雛(女雛)へ to Princess (standing)
- 立雛(男雛)へ to Prince (standing)
折り方 19 Step 19
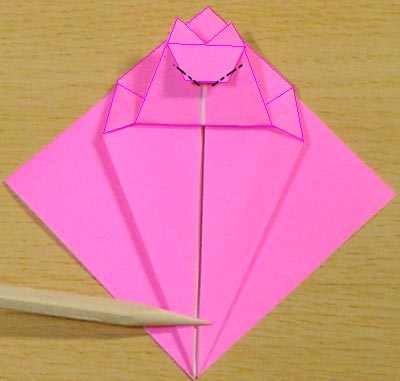
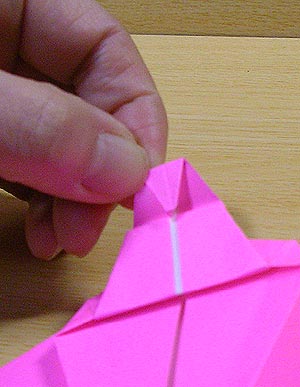
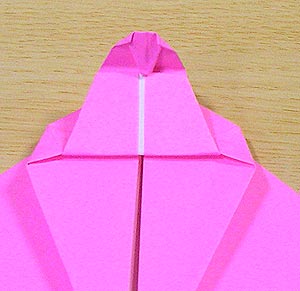
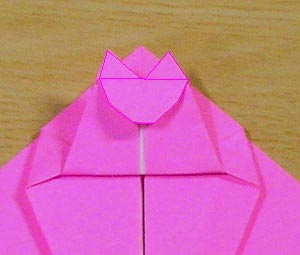
着物に進む前に。
女雛を折るときは、この角張ったあごのエラを丸めて、女らしくします。かどを後ろに折り込んでください。分厚くて折りにくいですが、写真のように、裏側にグッと爪を立ててスジをつけると、折りやすいようです。
Before we go to dress parts, trim off the face a little so that it looks more feminine. I advise you to first press your nail strongly on the paper and make a crease as shown in the picture, and then fold.
折り方 20 Step 20
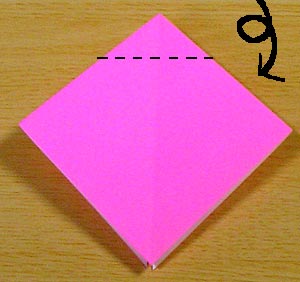
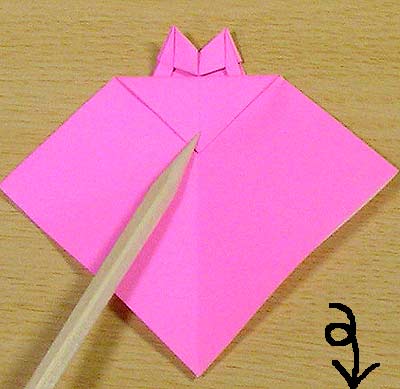
裏返して、谷折り。このように猫の耳が出るくらいの高さで折ります。折ったら、また裏返します。
Turn over, valley fold and let the ears are show, then turn over again.
折り方 21 Step 21
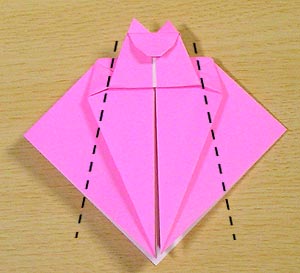
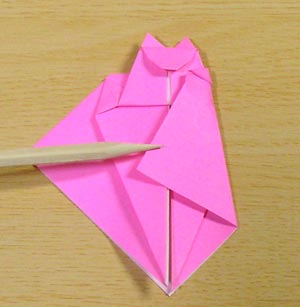
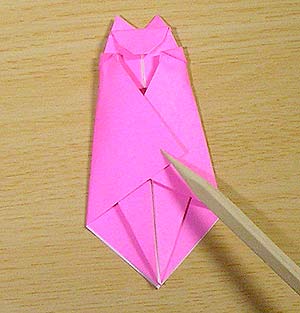
谷折りします。マントをたたむような感じで(笑)紙が分厚くて、折りにくいかもしれませんが、そこはガバッと折ってください。
Fold as if lapping your mant around your body.
折り方 22 Step 22
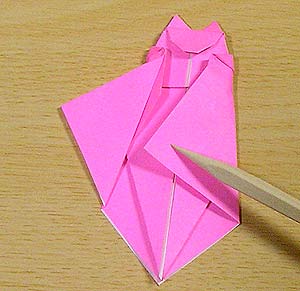
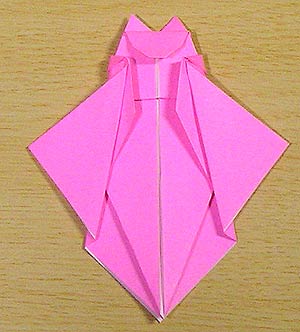
裾を、はなやかに広げます。図のように広げたら、裏返します。
Fold out, as if swinging out her skirts. Then turn over.
折り方 23 Step 23
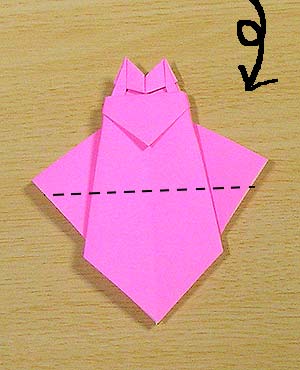
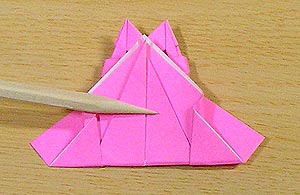
大きく折りあげます。紙が何枚も重なって、ちょっと固いのですが、十二単ですから重なって当然です(笑)思い切って折りあげてください。
Fold up. Papers are layered and it might be a little tough, so press hard.
できあがり Finish
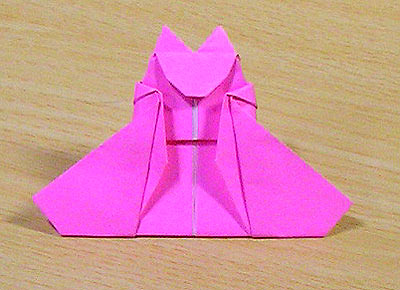
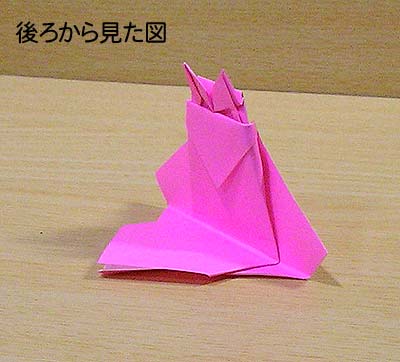
表に返して、できあがり。図のようにすれば、立たせることもできます。
キラキラした模様の入った紙で折ってみました。お雛様の雰囲気が出たでしょうか。
Conglatulations!
You can make it stand using the back flap.
⇒男雛はこちら to Prince Doll
(2008.02.23.)
←前に戻る ←back
他の猫折り紙もぜひご覧ください
For more origami cats;
*猫折り紙 Origami Cats
「猫折り紙」の著作権等については、こちらをご覧ください。
*猫折り紙について

